Obsession. Home Owners Anonymous?

Every year we buy a state park pass with the intent of enjoying evenings and weekends at Range Pond with the dogs, dipping our toes in the icy ocean waters or hiking along the waterfalls in the mountains. Every year we promise ourselves that we’ll travel more with our park pass, and every August we look back on the diminishing summer thinking, “why did we spend so much time on the house and not enough time in the parks?” Owning a house with a bit of land has always been a dream for me. Home renovations and mini-farming ventures have really become a hobby that Sarah and I can share together. We enjoy it. Unfortunately our hobby has taken over life as we know it. We work all day, come home, eat something quickly, and spend the rest of the daylight hours working on the house. We have put aside our times of leisure and have lost nearly all of our socialization so that we can dedicate all of our spare time to wood, tools, screws, and drywall. What is it called when a hobby encompasses your entire being? Oh right, obsession.

Hello Home Owner’s Anonymous. My name is Nikki, and this is Sarah. We are addicted to renovation.

You may have noticed that this is my first post in a VERY long time. It was not because we haven’t been doing anything…we have been doing far too much. This summer we added two new farming ventures, took the next step into homesteading, built a new structure on our property, and turned our house into a construction site. Summers in Maine tend to be short. It’s imperative that we start our projects early and finish them before the weather changes. There is simply no time to sit and write about what we’ve accomplished. So be prepared to see a lot in the next few weeks.


Categories: Life | Leave a comment

CO, Not Just a State in the West.

I spent most of my life in upstate New York, even choosing to attend a college that was a mere two hour drive from my home. By the time graduation rolled around, I felt that I needed a drastic change. I applied to four graduate schools, all four of them being west of the Mississippi (how many people still have to sing that song when spelling Mississippi, just to make sure they’ve gotten all of their i’s, s’s, and p’s in the correct spot?) I was accepted to the University of Wyoming and I gave 3 months to collect myself. I hopped in the car, and drove across the country with Sarah. We took our time as we meandered through Pennsylvania, Ohio, Missouri, and all of those other flat states in between. We traveled across Oklahoma, wanting desperately to invent a teleporter so we wouldn’t have to see flat, treeless areas of grass. Once we reached Colorado, my boredom shifted into awe. The landscape was beautiful, the people were friendly, and the towns were hip. Colorado was our diamond in the rough. Then we drove into Wyoming. It was almost instantaneous how the green grass and the silver and white mountains of CO changed into the red clay earth filled with dry shrubs of sage brush. The road that brought us into Laramie was empty, leading us into a part of town filled with run down hotels and bars without windows. Believe it or not, we cried. We found ourselves a hotel room and didn’t leave it for two days.

Every city has a personality, and not every personality is going to mesh with yours. Laramie never suited us, but that didn’t stop us from learning how Laramie functioned, and working with the good things it gave us. A little coffee shop (Coal Creek Coffee) saved our lives. Go there, it’s awesome. We created a temporary home in Laramie,  but always yearned for Colorado, making day trips down there often and pretending that we lived there instead.

After spending three years on a master’s degree, I began looking for jobs that would lead me out of state. My first interview and offer was for a wind turbine company in New Mexico. The offer was tempting at first…I mean, New Mexico wasn’t Wyoming, but I could never imagine myself living there. I am basically useless in weather that reaches above 70 degrees Farenheit, and air conditioning makes me grumpy and sick. It wasn’t too hard of a decision, I turned down the offer pretty quickly, and we celebrated and grieved the loss in Denver Colorado. Not long after, I came across a job opening in Maine. The application deadline had already been closed, but I sent in my resume anyway. The next day, I received a call. They wanted to fly me out that Monday for an interview. I’ve never visited Maine before, but I knew as soon as I arrived, that I was home. Trees hugged me on both sides while driving on the highway. There were no billboards in sight, only nature, water, and homesteads. Everyone was pleasant, inviting, and genuinely happy to see me (even if they didn’t know who I was or why I was there). I tried very hard not to fall in love with this new town, just in case I wasn’t offered the job. Luckily for me, I was, and I grabbed the opportunity like child would their favorite toy. I flew back to Wyoming, spent an entire weekend (with very very little sleep) pounding out my research, and on Monday I told my advisor I accepted their position while handing him a copy my thesis. In two weeks, Sarah and I were driving back across the country, this time driving through NY and heading straight for Maine.

Since then, we’ve been very happy here. For the first time, we are living in a town where it’s personality fits ours. We’ve connected to the area, and always felt safe here. That is, until we discovered the other CO lurking close to our home. This CO was not like the comforting qualities of Colorado that we loved (and still yearn for some days), instead, it was the well known, and often feared, carbon monoxide.

The first time my parents came to visit, they locked eyes on the original chimney running up through the house. “Do you have a carbon monoxide detector?” my dad asked. “Nope, but we should probably get one huh?” My parents made a quick trip to buy us a housewarming gift, and I’m glad we had it. Just the other night, Sarah had gotten home and was welcomed by the ringing of our carbon monoxide detector (and the dogs barking at the carbon monoxide detector). She thought it might have been a faulty battery, so she changed out the batteries, reset it, and put it back on the wall. It rings again. She takes it off of the wall, goes outside, resets it in some clean air, and walks back into the house. “Beep! Beep! Beep!” She takes the dogs out on the porch and calls our fire department. I was working late that night, so I get a call to pick up dinner on the way home, as we might be picnicking on the porch.

The response time for our fire department was very fast considering it is volunteer. She expects a man with a meter to come, but instead she gets the whole department, trucks and all. They take some readings inside our house and determine that we have a leak somewhere in our bedroom from the original chimney. We turn the furnace off, air out the house, and leave a message with our trusty plumber/heating specialist to help us with the chimney situation. Luckily, we had a two flu chimney built on the outside of our house not more than 6 months ago, so we had him hook our furnace up to the new chimney, taking the chimney in the center of the house of out commission. I’m really glad we were prepared for a situation like that.

A good friend taught us that once transplanted,  plants have a three year rooting. The first year they die, the second year they survive, and the third year they thrive. So far, it has been that way for us. The first year in our new house in Maine, we struggled to make ends meet, and worked endlessly to keep our house together. Our second year we repaid our debts, figured out how to manage a house, and quite literally survived a potential CO disaster. This coming year is the third year, our year to thrive, and I already have a great outlook on our future. Who needs Colorado when you can live in Maine?

Categories: Life | Leave a comment

To Gut, or Not to Gut…That is the Question.

The phrase “innocence is bliss” gets thrown around a lot, but is it true? If there is a problem that is invisible, would you prefer not to know or would you want to know right away? I guess it would depend on two things:

1. Do you have the money to fix the problem now?

2. Is the problem going to make things worse further down the line?

Ok, after writing that I realized it only depends on one thing, #2. Whether you have money to fix the problem doesn’t matter, the problem will have to be fixed if it’s going to make things worse. So buck up, grab a hammer and be prepared to do it yourself, because you can’t afford to hire a contractor!

We have two bathrooms in our house, one off of the “master suite” (aka, our room) and the other is downstairs next to the living room.  The one next to the living room is technically considered our “guest bath”. Seeing as it is neither upstairs, nor attached to a bedroom. It only gets used during the day (for potty breaks) and if we have guests staying with us. The room is fairly large, as it splits the space with our washer and dryer, but the layout is strange. The only bath tub in the house is in the guest bathroom, the closet is made of shelves that are 2.5 feet deep, and the sink is across the room next to the washer rather than near the toilet. The bathroom was painted a dull greyish green and was tiled with large grey-green and off white tiles.

100_1825

100_1826

It wasn’t the ideal set up, but it wasn’t something that we couldn’t live with for a few years. Remodeling the guest bath became one of those projects we put in the back of our mind for a “later date”. At least, that’s what we thought. It wasn’t long before we started noticing the grout splitting between the tiles. The splits turned to cracks, the cracks turned to chunks, and the chunks were eventually dislodged and kicked around the bathroom floor until vacuuming day when they were sucked up forever. The grout issues were annoying, but were still something that we could live with. Then, after 2 years of walking on the floor, the tiles began to crack.

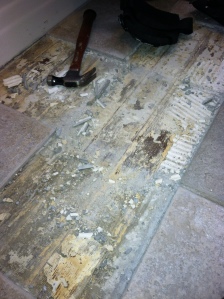
My parents were planning to visit in February. Every time  my dad comes up to visit, he has to have a project to help us with. We often comply, because I think its how he shows his love (even though he may not admit it). Since he’s done tiling before, we asked if he could help us fix the broken tiles and repair the cracked grout. He arrived toting his barrage of tiling tools and materials. He chipped up one tile, then two, three and four. We assessed the situation and immediately knew why the floor had been cracking. The previous owner tiled directly on top of hardwood floor.

photoA

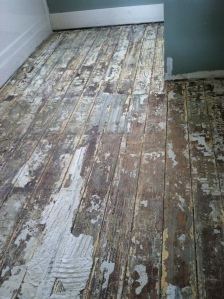
We had a choice to make at that moment. We could slap some new mortar on the floor, replace the tiles and re-grout, knowing that eventually the tiles will crack again (hardwood floor, especially one that is original to the house, is not stable enough to hold a tile floor by itself), or we could rip up the tile floor and re-finish the original hardwood floor beneath it. We chose the latter…why spend time and money to fix a problem that will just resurface again in the near future? So the tile came up.

photoB

Problems began to start when we got to the laundry room section. We ran out of hardwood floor. Crap.

photoE

We took a trip to Lumber Liquidators to find a hardwood floor to go into the laundry room  portion of the bathroom. We ended up finding a solid hardwood floor, in Cinnamon Maple, on clearance for $136. There was exactly 101.25 square feet…the exact footage of the bathroom + laundry room. We bought it all and decided that the fates were speaking to us: redo the whole bathroom floor.

Here’s where we might have gotten ourselves into trouble. After a quick discussion over a beer (dangerous), we said this: “If we are tearing up and redoing the floor, we’ll be exposing the plumbing. Why don’t we change the floor plan to something that makes more sense?”

To be fair, if we were going to change the floor plan of the bathroom, it would make sense to do it before we put in a new floor, but we had big hopes for this bathroom…bigger than we might be able to handle. The first problem was the location of the sink. We didn’t want to have to turn a corner and walk through a door frame to get to it. The bathroom sink should be near the toilet. The problem was that we didn’t have any more wall space for the sink in the “bathroom” portion. We had a massive tub/shower insert across from the toilet. This tub was the only tub in the house, but it was rarely used (aside from giving the dogs a bath in the winter and giving our guests somewhere to shower that wasn’t directly connected to our bedroom). I mean, who wants to take a bath right next to the living room? If we had a bath tub in the house, it should be in the bathroom that is upstairs, next to the bedrooms. Guests don’t need a tub either, no one should be relaxing that much in our house. So we decided to remove the tub/shower insert and replace it with a standing shower. That will open up the wall space and allow us to move the sink to the wall across from the toilet. Removing the sink from the laundry room portion opens that space up for a folding table and a drying rack. Perfect! (Well, almost…now that we plan to remove our only tub, we are pushing for a bathroom remodel upstairs that would include a new tub. But we’ll think about that later…)

So we were posed with the question, to gut or not to gut? We chose to gut. Here are the things you will need to gut a bathroom:

1. A bottle of wine chilling in the fridge (this is the most important part, and depending on what you think you might find behind those bathroom walls, you may need some Vodka instead).

2. A crowbar, drywall saw, and really big garbage bags.

3. A mask and safety glasses…dry wall is REALLY dusty.

Strangely enough, our toilet was locked in a cubby. I understand why someone might build a wall around the toilet. Without one, someone watching TV in the living room would have a clear view of the ceramic throne. But the wall that was built was a little too close, making you feel like a sardine while trying to do your business.

photoF

We tore down that wall, planning to rebuild it with decorative (and useful) shelves, 6 inches further from the side of the toilet.

photoI

After removing the wall, we noticed a leak behind the toilet – our gasket had rotted. We turned off the water, drained the tank, and took it apart to buy a new gasket. There are two different kinds of gaskets…make sure you research which one your toilet brand and model takes. Ours took a triangle gasket. Make sure you pick up some new washers too.

photoJ

We removed the toilet so we could get to the tile beneath it. Make sure you stuff a rag into the flange of the toilet. You don’t want the smells from your septic to waft up into the room. It may not smell right away, it’s not a continuous odor. It burps, and it’s vile.

photoQ

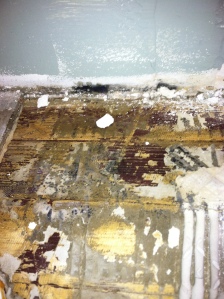
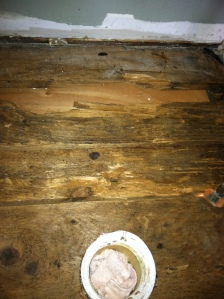
After removing the tile, we noticed that the leak had been occurring for a while…the floorboards were wet and we had mold growing. Bummer.

photoK

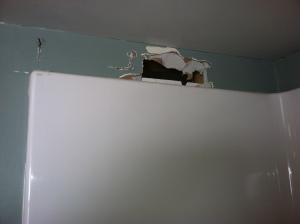
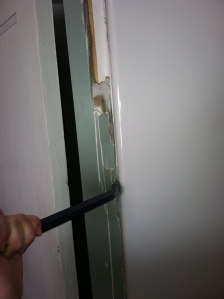
The next task was to remove the tub/shower insert. The side wall of the closet was holding it in, so we removed the shelves and then the wall. The plumbing for the shower was inside the wall, so we cut, capped, and removed the plumbing. Our new favorite thing in plumbing are Sharkbites. These are nifty little caps that snap on, and pull off of pipes. They made our lives easy in many ways.

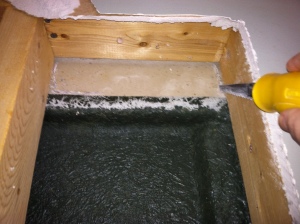
To remove the drywall, simply score it and punch it through!

photoN

photoP

To remove it from the side of the tub, use a crowbar.

photoO

Once the tub/shower insert was free, we pulled it away from the wall. It was awkward, but luckily it wasn’t heavy. It was made of fiberglass, so we were careful not to break it. We separated the shower wall from the tub and carried it outside. This is when we used our new favorite thing: Craigslist. We didn’t have a vehicle that could bring this thing to the dump, so we posted it on Craigslist with the tag “if you can haul it, you can have it”. In three days, it was gone.

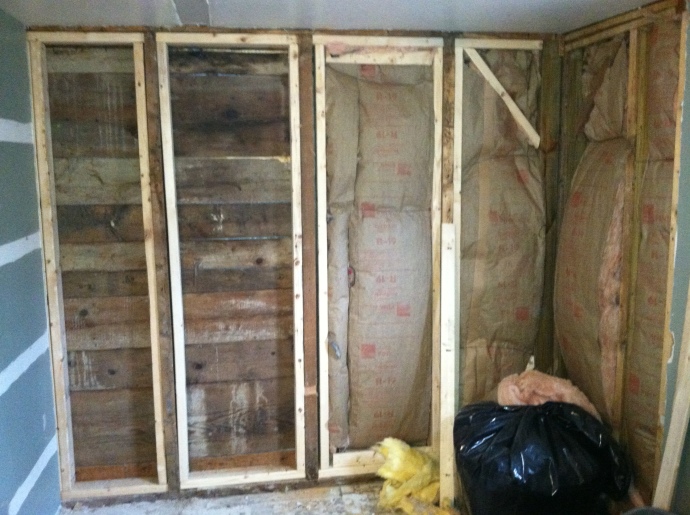
Once removed from the wall, we noticed a few BIG problems. First, the shower didn’t have drywall behind it, just insulation. This allowed mice to burrow in and make a really nice kingdom behind our tub.

photoL

Second, because there was no dry wall, there was also no moisture barrier. We had water damage on the floor beneath the tub, YAY!!

Third, this:

photoR

This hunk of sawdust is one of our support beams. We had some major carpenter ant damage. (Where’s that wine?) We knew a contractor that we could trust, so we called and asked him to check out the damage. Luckily, the damage was mainly superficial and the beams were hefty, so we could resupport the beams without having to tear them all out.

We tore out the old, mouse poop filled insulation, resupported the beams, and replaced the insulation.

photoM

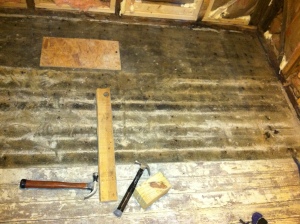
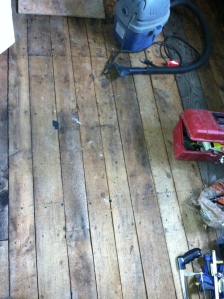
We then began tearing up the hardwood floor original to the house. Using a circular saw, and adjusting it so that the blade depth was only the thickness of the floor boards, we went around the edges of the bathroom. A crow bar was used to gently pry the boards from the subfloor. Nails were removed, and the floorboards were stacked in our woodshed until we could run them through a planer and turn them into pieces of furniture.

photoU

We had finally reached the subfloor. Unfortunately it had a lot of water damage, rot, and yep, carpenter ant damage.

photoW

Because these boards were made over 80 years ago, they were actually 1 inch thick (not like the current boards that are only 7/8 inch thick).

photoV

This discrepancy forced us to not just replace the damaged boards, but to remove everything and lay down a whole new sub floor.

Only two months after we removed 4 cracked tiles, we finished gutting the entire bathroom. Hopefully in the next post, you’ll see us put it back together.

Categories: Remodeling | 2 Comments

Imagine Whirled Peas — a Basic Kitchen Remodel

If history is a guide, evolution is inevitable. Many people attribute the theory of evolution to Charles Darwin, but he was not the first to document on this subject. Prior to Darwin, a French scientist named Jean Baptiste de Lamarck (hard to tell he was French with that name) explored an idea he called “the inheritance of acquired characteristics”. Lamarck began looking at the similarities and differences between salamanders and snakes, postulating that short legged salamanders who lived in grasslands often had trouble “stepping over” the grasses and thus resorted to slithering on their bellies. Their unused legs began to atrophy, leading to their offspring to stop from growing them at all.

Darwin and Lamarck expected the evolution of a species to take time. By no means were they suggesting that within one or two generations you would have a different species better suited to the environment than their parents or grandparents. (If that were the case, I would feel regret for my offspring who would be born in a sitting position with a computer screen built into their eyes and a gland that secretes caffeine.) Evolution of human perception and modern society hasn’t always been a fast process. The Catholic Church didn’t accept Darwin’s theory until 1996, and there are still schools in our country that refuse to teach anything but creationism in biology class.

But within the last decade, the introduction of social media has pushed the evolution of societal values at a faster rate than it’s happened in the past. Our opinion of controversial issues of gender, race, religion, sexual orientation, and economics are directly related to who we know and the personal stories we hear. After 9/11, there was mass hysteria in this country with a fear and hatred of Islam and those who practiced it. The fear slowly subsided after many courageous Muslims made themselves known saying, “we’ve been co-workers for years, I’m Muslim, are you afraid of me?”  Even being gay isn’t a big deal anymore. 15 years ago, the majority of people didn’t know anyone who was gay. Now, everyone has a gay friend, co-worker, or family member (if not more than one), and people are posting online the fun and unusual way they “came out”. This is evident in the two court cases (California’s Prop 8, and DOMA) being brought to the Supreme Court this week. 15 years ago, court cases of this subject and magnitude would have been unheard of.

The world is changing fast. The more people we connect to, the faster our views can evolve. The difference is that we are not asking the people to “evolve” to the world, we are asking the world to fit to the people in it. The more we evolve, the more inclusive we can become, which might eventually lead us to world peace.

“World peace” is a phrase that reminds me of two things. The first is obvious, Miss America: “I wish for world peace”. This video clip portrays it perfectly:

The other is a bumper sticker that was popular in the 1990’s, “Visualize Whirled Peas”.

whirled peas

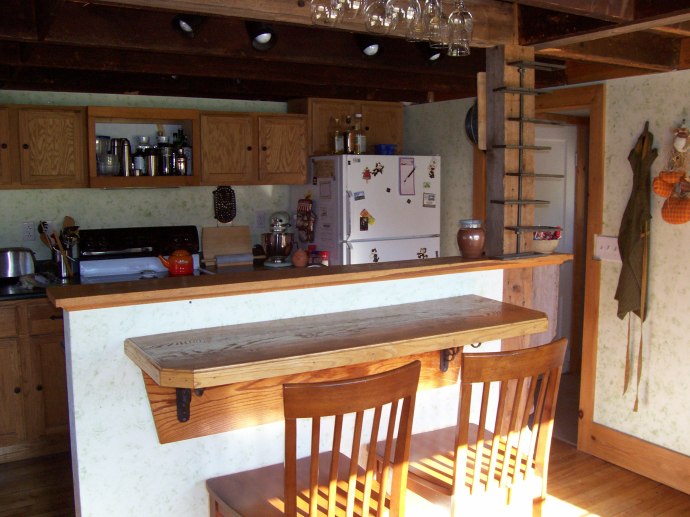
When we first moved into our house, a visualization wasn’t necessary. Our kitchen looked like a bowl of whirled peas has been put in a microwave in a crystal bowl which shattered and threw pea soup over every wall.

100_1819

The past owners were either trying to save paint, or were attempting the new fad of “sponging” the wall. After hanging the dry wall, the previous owners rolled on a basic primer (not white, more like a grey-ish smoker color). Rather than put a solid paint on top of the primer, they elected to just sponge some green paint on top of it in random areas. The combination of the green sponge paint and the grey primer left us with confusing, ugly walls. Because the primer is flat, it didn’t reflect any light back into the room. The sunlight that entered the kitchen was just absorbed by the walls. The beams and the ceiling were painted a dark black/brown which didn’t help with our lack of light situation.

It may not be a surprise to you, but the kitchen is my favorite room of the house. I spend a lot of my time in there, cooking, eating, and drinking (sometimes simultaneously). I didn’t want to spend my time in a dark, pea soup covered room. This was an opportunity for me to change my favorite room to reflect what I wanted to work in, rather than push myself to evolve to the colors we were given. 

100_1821

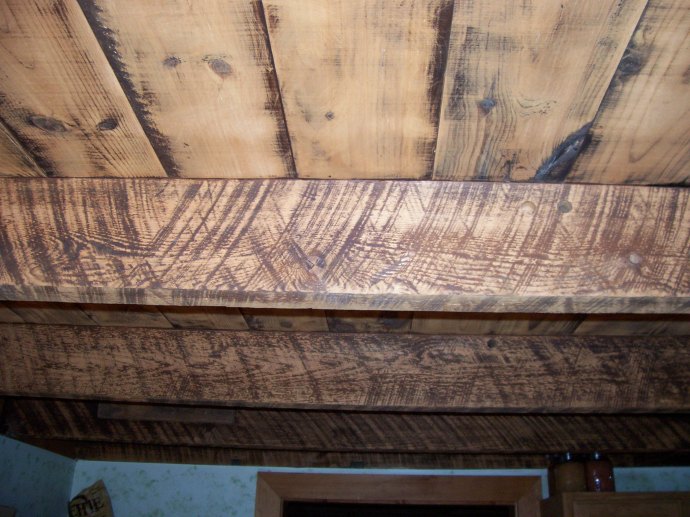
The celing beams, being original to the house, have saw patterns marked into them. These made it difficult to sand the beams to down their original color. Eventually, we decided it wasn’t worth the trouble, and only sanded off the surface stain. This left us with the stain left deep in the saw marks. It ended up being a win-win situation, because the ceiling was much brighter than before, and the saw marks (now more obvious) gave our kitchen a unique pub-style feel. We sanded the ceiling with a hand held sander which we reluctantly held over our heads while balancing on a step ladder. It wasn’t the safest plan, but it worked. The entire ceiling only took us 6 hours to finish, even though it felt like days (our arms have never been so tired). The hand sander had a sawdust collection bag, but it didn’t collect anything compared to what was spread around the kitchen and gunked in our hair. The clothes and shoes we wore that day were so saturated with sawdust and wood stain, that we just threw them all out. My hair went through the “rinse and repeat” cycle three times before I felt clean enough to leave the shower.

100_2110

We chose a bright, bold yellow for the walls of the kitchen. We ended up with a semi-gloss paint to help reflect some of the sunlight through the room without turning the wall surfaces into a mirror. The yellow was meant to brighten up the room and mimic the incoming sunlight from the windows. (It was also a silent protest to the dank green that graced our kitchen originally.) To make our lives easier, we decided to get the Behr paint and primer in one. After painting with it, we decided never to buy it again. Paint + primer dries like a strange plastic sheet. When removing the painting tape from the edges, the paint + primer would pull off in large sections like cellophane. We ended up having to get an exacto knife to cut the paint from the tape.

100_2141

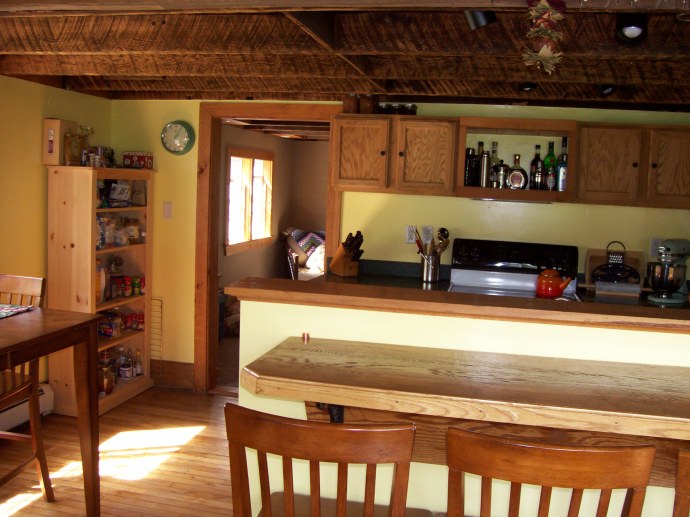
The work was rough and our arms were incapacitated for days afterward, but the alteration has been the most rewarding remodel project we’ve done yet. A few colorful wall hangings, and our kitchen has evolved to be more inclusive to the light.

100_2140

Categories: Remodeling | Leave a comment

Hearth and Home

Winter in Maine is cold (but I’m sure I didn’t have to tell you that). A well insulated home is something that we all strive to keep, either because we care about the environment or we don’t want to waste money by letting out the heat we’ve already paid for.

Heat has always been an interesting area of study for me. Like light, everyone knows that it exists, but no one (aside from a few curious scientists) really take into consideration what it is and how it’s created. As a physicist, I quietly cringed at the last sentence, because of the technicality that something can’t actually come from nothing. Energy is something that can neither be created nor destroyed, instead, it is transformed from one state to another. This law, the conservation of energy, is one of the very first things we teach new physics students. My students silently nod their head when I ask if they’ve understood, but I know that they haven’t when I get a question like: “If there isn’t a loss of energy, why does the skateboarder on the half pipe slow down?” (That’s right, skateboarder on a half pipe. How else are we going to keep this generation interested? By giving them a ball?)

The answer is friction. Friction is everywhere in the skateboard problem. The wheels rub on the axle, the wheels rub on the track, there is air resistance on the skater as well as on the skateboard itself. Friction slows the skater down. It takes away energy from the skateboarder. But if energy doesn’t disappear, where does it go? It’s transformed into sound energy and heat. (Just like a physics teacher, after a long winded example I finally state my point.) What is heat? Heat is the amount of energy that is transferred from one substance to another. Temperature, a common measure of the heat of a substance, is quantifying the amount of the energy the atoms in the substance has. Heat will naturally flow from hot to cold, so the next time your Mom yells at you to “shut the door, you’re letting in the cold”, tell her she’s wrong, in fact, you’re “letting out the heat”. (On second thought, don’t tell your Mom she’s wrong, Mom’s don’t like that.)

Heat is transferred through the collisions of “hot” atoms with “cold” atoms. The “hot” atoms, which are moving faster than those atoms that are considered “cold”, bump into each other. When that happens, the “hot” atom gives up some of it’s energy to the “cold” atom. Now the “hot” atom isn’t moving quite as fast, and the “cold” atom is moving a bit faster. Think of it like a crowd scenario. The people in the front of the crowd are standing still, they are “cold”. The people in the back hear rumor that Walmart is finally opening their doors for the Black Friday specials and they rush the door as quick as they can, bumping into those in front. The people in front start moving, but because they were stopped at first, the people in back have to slow down. Soon enough, the whole crowd is moving at the same speed into the door. The crowd has reached “thermal equilibrium”, they are all the same “temperature”.

The same thing happens in your house. Leave a glass of cold water on the table, and eventually the room will warm it up (and yes, the cold water cools the room a bit too). Leave the front door open, and the house will begin to send heat to the front porch. Light a fire in a woodstove, and the fire will heat the cast iron (or steel in our case), which will heat the air around the stove. But what gives the energy to the fire? Would you believe it if I told you it was the Sun? No, we’re not creating fusion in our stove (if I were, I’d probably be given the Nobel). The energy of the fire comes from what we “feed” it, i.e. the wood. Trees take their energy from the Sun. Biology isn’t something I am fluent in, so how the trees get their energy from the Sun won’t be discussed in this post. Sorry Biologists! The amount of heat energy you can get from a piece of tree depends on the water content in the wood. Dry, or seasoned wood, gives off more heat energy to the room because less energy is wasted when boiling off the excess water trapped in the wood.

So, long story short, to keep your house warm during a Maine winter, make sure to insulate any area of your house that can leak energy to the outside, and burn dry wood. …Basically everything you’ve ever been told, but aren’t you glad you know why now?

Ok, now to the fun part. After sealing up the areas of our house that were leaking the most energy, we decided to save the cost of heating by putting in a woodstove. Oil has been our primary source of heat since moving to Maine. Unfortunately for me, Sarah was raised in Florida, so her ideal temperature in the winter is 67 F. Keeping a house at that temperature on #2 fuel oil is costly. Wood heating is 1/2 the cost.

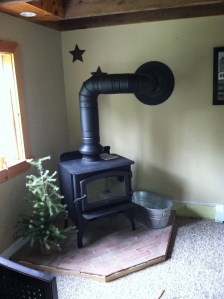
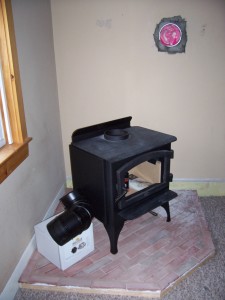
We bought a Lopi  steel stove that can heat 1200 sq ft (the exact area of our house). Because the living room is small, we decided to build it into the corner of the room to save space. Woodstoves are heavy and hot, so we needed to build a strong, supportive, fire resistant pad to set it on. We looked at the premade pads, but quickly dismissed them because of their price. We remembered the pallet of bricks we had decaying in our woods, and decided we would make our own pad out of those. We drew out the plans and began.

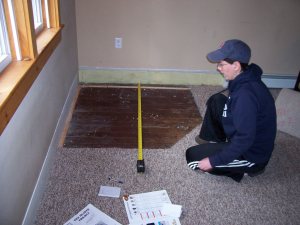
The first step was to move everything away from the corner and pull up the carpet. We found a beautiful wood floor beneath the carpet.

100_2189

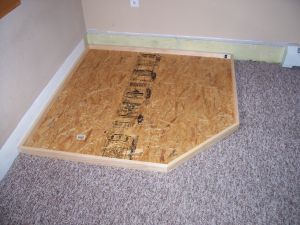
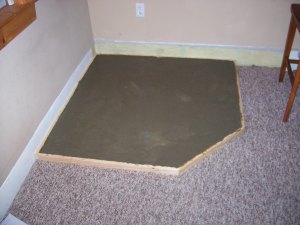
The next step was to build a foundation. We made the base out of plywood and the edges from 1 in x 2 in pine boards.

100_2191

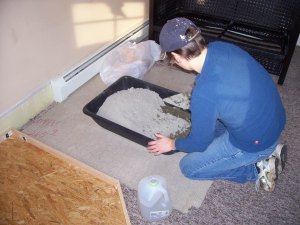
Fill with cement. By the way, mixing cement in the living room…not a great idea. It’s really dusty, messy, and heavy. Let it dry.

100_2192

100_2193

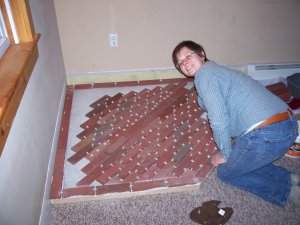
Figure out a design for the bricks, and cut to size. Cutting brick should always be done outdoors. Brick gets very dusty! We were cleaning brick  from our shed dust for months.

100_2194

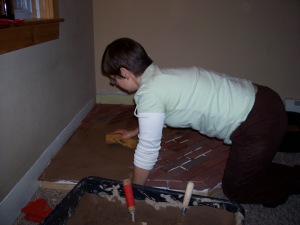
Lay the brick in place and let dry.

100_2195

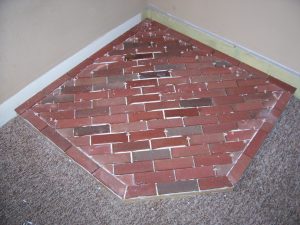
Mortar time!

100_2196

100_2197

Once it’s dry, add the stove. We had our stove delivered and hooked up by professionals. Stoves are heavy, pay the extra $75 dollars to have someone else bring it in for you.

100_2198

When it comes to hooking up your stove, have a licensed professional do it. If it’s not done correctly, you could easily start a fire.

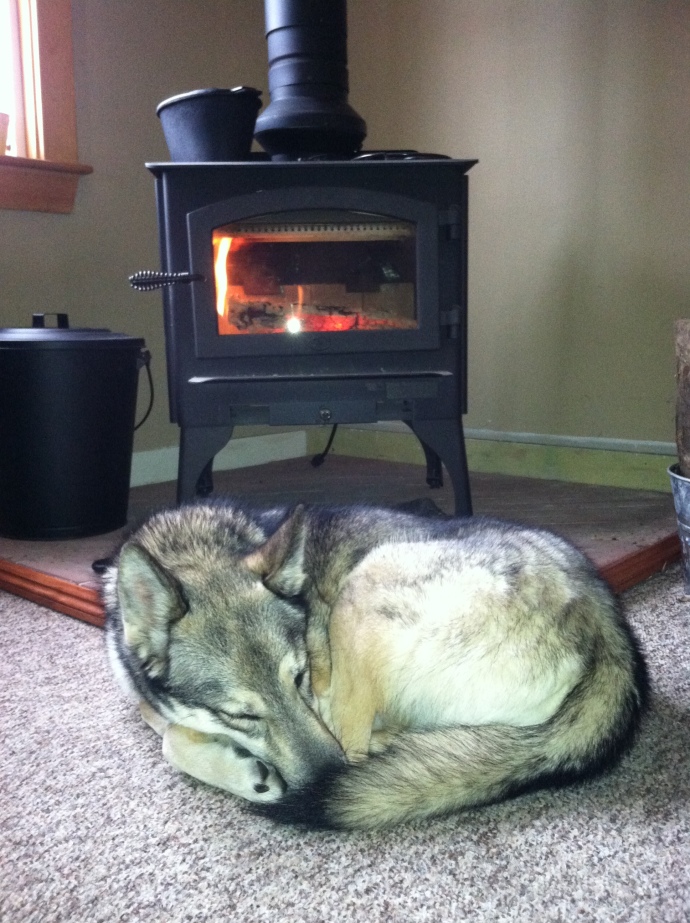
photofire

Grab the marshmallows, move the dog, and prepare to get toasty!

 photoFireDog

Categories: Masonry | Leave a comment

Adding a Little Color to Your Life (and Your Neighborhood)

This summer we took on the challenge of painting the exterior of our house. It was not something that we wanted to do so soon after moving in, but it was a necessity after seeing what one winter had done to the water based primer the previous owner had convinced us was white paint.

We began with scraping off the chunks that had started peeling from our house. A heavy wind was enough…the rest was taken off with a garden hose and a soft deck brush. It was a lot of work (most of the total work), but difficulty level? Very low.


The caulk was removed and replaced,

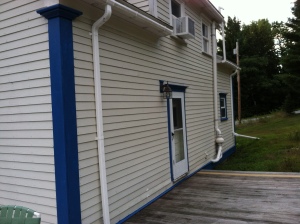
The colors were chosen (as always, with our tongues), Blueberry and Toasted Sesame. The first bit of blue that went on was shocking…We were so used to white on white that a little bit of color threw us into a tizzy. “What the hell did we do?? It’s SO blue!”

We contemplated stopping and returning the paint to get a duller color. The problem was, neither of us agreed on anything else in the store, so the blue stayed, and we kept painting.

Now it was time for the siding. “It’s too light!” “No, it’s too dark!” “Too late now, the paint is already on the house.”

It took us five months to complete the job. Not too bad for first time house painters! (And…now that it’s finished…we love the colors!)

Before:

After:

And the back side:

Some tips of the job:

1. You can do it! (And if you do, it will save you thousands of dollars)

2. Power washers are your best friends, use them (but do it wisely…too close to the wood and you’ll be replacing the shards that was your trim a moment ago).

3. Oil primer should be used on wood surfaces, but do not use an oil primer on a hardie board or composite siding.

4. Acrylic (water based) paint can be painted on an oil primer, or, use paint + primer in one! We used an acrylic low-luster blue paint on our oil primed wood trim, but for the composite hardie board, we used a paint + primer in one (as it was pre primed from the manufacturer).

5. Bright colors can be scary, but they are beautiful when you have confidence in them.

6. More scary than bright colors, a 26 foot ladder. Buy a sturdy one, and you’ll only be slightly scared out of your whits at the top.

7. When you’ve finished, go out for a beer (or two). You’ve deserved it.

8. Be sure to save enough money and time to re-do your deck, because now your house makes it look terrible! 🙂

Categories: Remodeling | 2 Comments

D’eres No Chow Like Chowdah

Broth, Cream Soup, Gazpacho, Bisque, Chowder.

Seriously guys…can we come up with another name for soup?

Puree, Chili, Stew.

Yep. What do all of these have in common? They are quazi liquid, served in a bowl, eaten with a spoon, food stuffs. And I love them all.

One has to be careful when naming their recipe once a soup is created, there are a lot of technicalities.  For instance, a broth is thin and watery. It is created by boiling down veggies, herbs, and/or a meat. All of the veggies, herbs, and meat are then strained out of the pot, leaving only the broth. A broth soup, is the broth with any host of fruits, veggies, herbs and meats inside a broth. A cream soup is a broth soup with heavy cream, half and half, or milk added to it. If you throw that cream soup in a blender, the result is a puree. Toss a broth or cream soup in the refrigerator and serve it cold, and you have a gazpacho. Make the broth out of peppers and you have a chili. If you cut the veggies and meat chunks very large and cook it slowly, you have a stew. Add sauteed shellfish to your broth, thicken with rice, and throw it in the blender – now you have a bisque. But if you really want to confuse people, make a tomato bisque, which essentially is a non-seafood based, creamy tomato soup puree. Lastly, the chowder (or as people in Maine say, chowdah). A chowder is a creamy seafood soup traditionally thickened with crushed crackers. However, if you are in Manhattan, your chowder is dairy free with a tomato base instead. If you are in the Midwestern United States, your chowder is seafood free, usually with corn as the star ingredient. Can you see what I mean about complications?

Creamy soups have always been on my favorites list, but more recently, the chowders have stolen my heart. Since moving to Maine, I have been a loyal corn chowder chef. At this point you are probably asking yourself “why not clam chowder?” Well, to be perfectly honest, I don’t know the first thing about cooking clams. Corn, I can cook. Someday I will learn how to make a great clam chowder, and when I do, you will hear about it. Until that day, I chose to celebrate Maine in my own way – with lobster.

 When I have the chance, I always try to buy local. Corn from John, two houses up. Eggs from Pam, two houses down. Veggies from my garden and lobster from Elaine’s husband at the bottom of the street. When we heard that a lobsterman was going to be selling his stock off so close, I had to create a meal that commemorated the occasion. Local Lobster Corn Chowder was born (and it was heavenly).

And here is how it was made:

Ingredients:

1/2 cup butter, 2 shallots, 1 garlic clove, 1 red bell pepper, about 3 – 3 1/2 cups of broth, about 1/2 a cup of flour, 1/2 cup of cream,  4 cups of corn, 1 lobster, a few large pinches of sea salt, 1 tsp of old bay seasoning, a dash of black pepper, and a handful of fresh green onions

Melt 1/2 a cup of butter in a large saucepan. Saute 2 shoe stringed shallots and 1 minced garlic clove, and a diced red bell pepper in the butter until soft.

Strain the pepper, onion, and garlic and put it in a separate bowl (set aside), leaving the melted (and now seasoned) butter in the pan. Remove from the heat and add flour to make a rue. A rue is like a flour/butter paste. It should be thick enough that you can roll it into a ball, but don’t actually roll it into a ball (yes, I did that once…my mom and I had a communication error). Stir the rue well enough that all of the dry flour is incorporated and you have a smooth texture. Slowly add warm broth, mixing constantly until all of the rue is dissolved. You should have a thickened chowder, similar to a gravy. Replace onto the heated burner and cook on low, stirring constantly. You will notice your chowder beginning to thicken, this is when you start to add your cream (about 1/2 a cup), pouring slowly. Once all of your cream has been added, continue adding more broth until your thickness is the consistency of a thin gravy and stays that thin even while on the burner. (This may be around 2 1/2 to 3 cups of broth.) Return your onions, garlic, and bell peppers to the chowder and simmer on low heat.

You’ll need about 4 cups of corn (about 4 ears of corn). Puree 2 cups in a blender with 1/4 cup of broth. Pour creamed corn into your chowder. Add the other whole corn to your chowder as well.

Add some sea salt and black pepper to taste, and continue to simmer on low.

Now it’s time to cook the lobster. Sprinkle 1 teaspoon of Old Bay seasoning and a large pinch of Sea Salt to the water. Bring to a roaring boil. Place the lobster in the pot, cover, and set the timer for 10 minutes. When the timer finishes, pull the lobster out and set him on the counter to cool. Once cooled enough to touch, break him apart, setting the meat aside.

Chop a few green onions as a garnish.

Pour yourself a bowl of chowder, toss in some tasty lobster meat, and flatter the dish with your fresh green onions. Enjoy…I know I did!

Categories: Food! | 2 Comments

#2 Fuel Oil and an Alternative Source of Heating

“Marshmallows!” That is the first thing that popped into my mind as I rounded the corner into the living room of our soon-to-be new house. (The second thing that popped into my mind was an image of the Stay Puft Marshmallow Man from the 1984 Ghostbusters movie…this, I am sure happens to everyone in my generation after imagining a perfectly toasted marshmallow.)

I knew that the woodstove that sat in the middle of the living room floor would cause problems (most of these as stubbed toes and hip bruising), but the promise of warm fires and toasted marshmallows drew me in to love the damn thing. We were forewarned when we bought the house that the woodstove was not up to code and should not be used until a proper venting system was created for it. The thimble to the woodstove was attached to vent out of the chimney that ran through the center of the house. This would not normally be an issue, except that the same chimney (our only chimney) was also the vent for our oil burning furnace. While it might be ok to run two or more thimbles into a single flue chimney, mixing the exhaust of different combustion materials is a major no no. Thus, our hell begins.

The first winter we spent in our house was a doozie. It was cold, windy, and we had more snow than we had piles to shovel it on. We had spent everything we had on the house inspection and other necessary things we had needed (snowblower not included), so when the winter came around, we grabbed two shovels and hoped for the best. Every week we would have a foot or more of snow dropped on our driveway. The first few times our neighbors helped out by plowing our driveway or swinging over with their snowblower – we were eternally grateful, because there is nothing worse than coming home after work to find 3 feet of snow in the driveway and no where to park your car on the dark, icy, country road. We would spend hours shoveling and when we came in we were wet, cold, and tired.

Although a fire would have been the perfect end to an evening of shoveling, our woodstove was cold and empty. It had become a very large and heavy shelf for our things. It dried mittens, it held trinkets, and it even supported our Christmas tree for a few weeks. We had every intention on reventing the flue, but didn’t have the funds to support it yet. In the mean time, we were burning nearly 100 gallons of fuel oil every three weeks. Now, for those of you who know me well, you know I am a bit of an eco nerd. The fact that I was burning that much oil disgusted me…but that was only second on my mind behind oil being $3.65 a gallon and climbing.

The straw that finally broke my back happened in March when Sarah was in Florida. We had just adopted a new dog (Chloe), and I was attempting to train her. A massive snow storm barreled through the area and dropped a foot or more of snow. I am forced to leave both dogs in the house while I spend four hours trying to shovel enough driveway space to get our car off of the road. I come back in to say hi to our untrained dog, only to find her on top of the kitchen table, excrement everywhere. Could  it get worse? The power goes out. The house slowly cools off throughout the night, but when the power returns, the heat does not. I smell smoke. The furnace motor is dead. So now I am cold, worried about the pipes freezing, wondering what to do with the dogs (because it’s too cold to leave them home), and I have to go to work. Must have been nice in Florida. Thankfully, I was able to get the furnace fixed that day…but I have been an avid pusher for a new chimney ever since. Sarah, not actually having been home over those two days needed more convincing.

The weather warmed up and summer came. I kept pushing her to help me find a mason who would build a new chimney for our woodstove before winter fell again. We found a mason, but decided to wait until we had enough money saved to build a chimney without a loan. In August, hurricane Irene hit. We lost power for over a week. Lucky for us, working at a college has its perks. We were able to shower at the gym and had access to water. Food was a different story. We had to eat out for a week, as there was no way to cook the food we had. Even in August when it was warm, a hot pot of water is priceless. This was my bargaining chip. “Sarah, I know that we had said we would save for a chimney first, but if I got a loan for it, could we build it now? What will we do if we loose power for over a week in the middle of winter?”

We started the process in September. We contacted our mason, who said he would start building the foundation. We began to clean the woodstove. When we were finally able to pry the doors open, we found 3  inches of ash. We shop-vac it until it was pristine. We noticed there were a few pieces that were cracked, warped, and melted, so we took pictures of the pieces and went to the local fireplace shop to order replacements. It was then that we learned that the “newly installed woodstove” was “newly installed”, but not a new woodstove. Our woodstove was 25 years old. We also learned that day that woodstoves don’t last a lifetime…they last 10-20 years or so. So, we went shopping for a new woodstove.

By now it was the third week of October with no word from our mason. We called to see when he might start digging the foundation – after all, the ground was starting to freeze. A week goes by, and without a call, he shows up, digs the foundation, pours the cement, and allows it to dry. Two weeks go by without a word. We call him, he says he’ll be there that weekend to start building it up. No show. We call again. He’ll be there sometime this week. He shows up on Friday, works for two hours, leaves. Three weeks go by, it is now mid December and our chimney is only 4 feet tall. We call him again, he’ll be there that weekend. No show. It isn’t until 2 days before Sarah and I are going to travel for Christmas break does he show up again. He rips a massive hole in the side of our house for the thimble. Throws a thimble in it, patches it up shoddy, sticks some newspaper in it and calls it good. We wrap the thimble, clean up his mess (because he was too busy to do it), and get ready for our trip. He comes by the next day (yes, two days in a row, a miracle!) and hooks up our stove. It looks terrible. We decide it needs to be redone by someone else, so we call our local fireplace shop and make an appointment for the new year.

While on our vacation, I get a missed call and a message on my phone. Our chimney is done, we can burn in it. We drive home, look at our chimney, and we both get a sick feeling in our stomachs…it just doesn’t look right. The woodstove installer comes the next day, removes his work, and precedes to tell us that he will not hook up our stove until we get our chimney inspected – he already sees several codes that have been broken. Not to mention, you need a license to hook up a woodstove, which our mason did illegally. Thankfully we were smart enough to NOT burn in our stove, as there is a good chance we could have set our house on fire and our insurance would not have covered us for it.

We hired a chimney inspector. He laughed at this mason’s work and gave us all of the codes that he broke. Simple things, like:

1. Make sure the chimney is tall enough, make sure that it surpasses the crest of your roof. Duh. This can set your roof on fire.

2. Make sure that all of the mortar on the inside of the chimney flue is wiped clean, or else it will cause turbulence and creosote will build up. This will start a chimney fire.


3. You need 18 inches of non-combustible material between the thimble and a combustible material. Otherwise, you can start a wall fire.
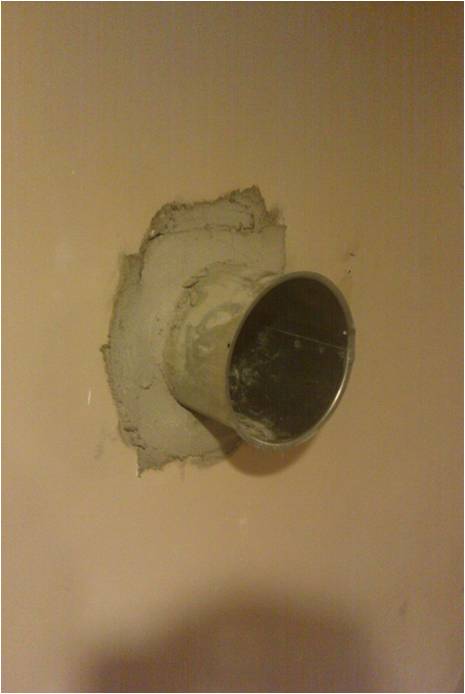
4. Your thimble can not protrude inside your chimney flue, it must remain flush to the flue. Otherwise, a chimney sweep can not clean it, and it can start a chimney fire. If it is WAY too far into the flue, the hot air will back up into the thimble, creating an unsafe situation in the woodstove and the woodstove flue.

5. EVERY flue must have a clean out door.

Our chimney was deemed unsafe, and was to be taken offline (luckily, it was never put online). We called our mason. He argued with us, telling us that our chimney inspector was wrong and didn’t know what he was talking about…after all, he had been building chimneys for years. But, we withheld his payment until our chimney passed code, so he promised to fix his mistakes. He would do it in the spring, since it was too cold for him in January.

Lucky for us, we had a very mild winter this year. We didn’t loose electricity a lot, and when we did, it was never for long. Snow was not an issue this year, and we finally could afford to buy ourselves a snowblower for Christmas. We has long stretches of temperatures in the 60’s and 70’s in February, and although we and our neighbors spent time outdoors getting things done, our mason could not be reached. It wasn’t until April that we hounded him – leaving messages on his 5 different phone numbers every day. It wasn’t until we threatened to take him to court that he finally called us back. He told us that he wouldn’t touch our chimney until he received payment from us. We, seeing the work he had done, refused to pay him until he could provide us with a chimney that passed code. He told us that our chimney inspector was full of shit, and that it was the fire marshal that passed chimneys, not the chimney inspectors.

The next day, I called the state fire marshal. I told him our situation, and relayed the inspection report to him. I learned that the state fire marshal does not inspect chimneys, that is what the chimney inspectors are for. He assured me that my inspector did everything right, and I should listen to him. He gave me the website to the attorney general’s page, and told me to contact their consumer protection division and to follow through with their process. If it came to court, the state would be behind us.

I followed the directions from the attorney generals page. Before a mediation can begin, they recommended sending a formal letter to the mason, detailing dates, payments, and issues, as well as your demands. The letter must be sent priority, and you should have the letter signed on delivery so you can prove that it was received. I had been keeping phone conversations, emails, receipts, and dates, so it was an easy (albeit, infuriating) letter to compose. We told him to have the chimney brought up to code by May 31st. On May 28th, a new mason shows up. This mason, new to us, was hired by our old mason. We were not notified of this mason switch, we were not asked if it were ok, and we were not told that he was going to be working on our house that day when we weren’t home. All of that aside, he did decent work, was polite, and actually showed up for a week straight, working on the chimney until it was fixed.

We had the inspector come back a second time. He said the chimney was good stave for one thing, the thimble in the basement flue was still only 6 inches from a combustible surface. To get the 18 inches needed, they would have had to drop the thimble that much lower (which we found impossible due to the placement of the chimney foundation), or replace the current flue with an insulated one. We mentioned this to our new mason, who proceeded to chew us out telling us that we don’t know what we are talking about and that our chimney inspector doesn’t pass our chimney, the local code enforcer does…go figure. (By the way…the local code enforcer reports to the state, who refers you to the state fire marshal, who refers you back to the chimney inspector.) Three weeks later, the new mason comes by the house (unexpectedly, of course) and disrupts our dinner with guests. We have to go downstairs and let him into the basement to pop in the adaptor. This adaptor attaches to the end of the flue so that you can hook an insulated pipe to it, but doesn’t make the thimble insulated itself. We call the inspector, no good.

Our old mason calls…”where’s my money?” We tell him that the downstairs thimble is still incorrect. We tell him which one to buy. Two weeks later (now into July), he randomly drops by. He brings the piece. I take the piece number upstairs, call the inspector and tell him what it is. It’s the wrong one. I tell our mason to stop working, buy the right one and come back by the end of the week. He does. We check it over. We approve. We pay him and send him off with a big “fuck you” as he drives off our property for the absolute last time.

So, what did we learn?

1. When someone says that something is “newly installed”, it doesn’t mean that it’s new.  

2. Build your own chimney, because you can’t trust anyone more than you can trust yourself.

3. If you must hire a chimney mason, ask them to see their NFPA-211 (it’s the code book). If they know what they are doing, it will be with them. If they actually use it for their jobs, it better not look brand new.

4. When you hire someone to do the work (mason, carpenter, plumber, electrician…), do your research, know the codes, watch them constantly, and question everything. If you let them do what they want without question, the only one you are screwing is yourself.

5. Sometimes the “three times longer” rule doesn’t apply, sometimes the project will take 6 months longer to complete.

In a few short weeks our stove will be up and running. Let’s hope that it was worth it.

Categories: Masonry | Leave a comment

Caring for an Orchard, and for Ourselves

Kah-Kah.

If you were anything like me as a child, you probably heard that  a lot.

“Don’t touch that, kah-kah.”

“NO! Don’t eat that, kah-kah!”

“Euw! Kah kah, drop that!”

If you haven’t figured it out by now (or never heard it used while you were young), kah-kah = dirty. I heard it on a daily basis as a child, whether it be in reference to the brightly colored piece of trash I found on the department store floor, the creature I captured from the stream with my bare hands, or the “fruit & fungus” I foraged from woods. In fact, it was from the root of “kah-kah” that my mom named my favorite doll.  This doll, no doubt pristine when I received her, was dragged through the dirt, ripped and torn, stained, and by all accounts, kah-kah. So what did I call her? Thankfully, my mom altered the name slightly from Kah-kah to Kah-Kia, saving my dolls reputation.

As I grew up, kah-kah was replaced by an explanation as to why I shouldn’t touch/eat/collect certain objects. A lot of these explanations centered around germs while the other’s were explained as poison. Were these items that I found actually poisonous? Probably not, but it was better to be safe than sorry when you were unsure of what you were touching or eating.

Foraging was never something our family did. I grew up in the suburbs, just as my mom did. My dad grew up in the country, but his parents both worked at a local supermarket. Thus, I learned as a child, that if it comes from a supermarket, it is safe to eat. If it comes from the wild, and you are not 110% sure that it is safe to eat, better not try it. The only fruits and veggies I had “off the plant”, came from gardens, orchards, and the occasional apple from one of our two apple trees in our back yard. We had a third tree in the yard, a black cherry tree, that we were not allowed to sample from. My parents didn’t plant it, they weren’t 110% sure it was safe to eat.
Please don’t take me the wrong way, I don’t blame my parents for handling the situation this way. I mean, who had taught them how to forage? How were they to know what they could or should not eat from the wild unless they planted it themselves? So the idea of being able to eat things that grew naturally out my front door wasn’t an innate habit, it was one I had to, and still am, learning.

When we bought the house, it came with a small orchard of heirloom apple trees and pear trees. At first glance, the backyard is beautiful. What sold me on the house (don’t tell Sarah) was the first bite of a pear plucked from the tree I was standing beneath. The seller of the property picked the pear, handed it to me, and said “give it a try, it’s delicious”. At first, I was hesitant…”should I take a bite? Do I know it’s not going to make me sick? Can I trust this guy?” I took a bite. It was good…probably too good. It was then that I thoroughly embarrassed myself by turning the pear over to take a second bite. I was staring face to face with a spider. I screamed, threw the pear, and ran in the other direction. I’m not proud of what I did, but at least I can laugh about it now.

The one bite I took from that pear changed my outlook on food. The pear was juicy, warm, and sweet. It was flavorful, unlike the tasteless pears you buy from the grocery store. I began to scope out local farms who have stands that sell veggies, eggs, and pasture raised meat. Everything I was eating was richer in flavor, kept me energized longer, and made me feel better than I had before. It wasn’t long before the headlines began shouting of tainted beef, a recall on cantaloupes, salmonella in spinach…all of a sudden, it was the food from supermarkets that were poisoning people and making them sick. Sarah and I were so horrified by this, that we sprung into action mode. We were going to plant a garden, learn how to can/freeze/preserve foods from the summer to last us through the winter, we were going to begin raising chickens for meat and eggs, we found a local farm for pasture raised meats, and we were going to revive and maintain our orchard.

The garden, although small was plentiful. We found a couple of farms that supplied us with fresh veggies to freeze, we picked berries and learned how to make and can jams, and our butcher knows us by name. Our chickens were a bit more challenging…but we all have to start somewhere. The orchard has been a process. By the time we moved into the house, it was October and most of the apples and pears had fallen from the trees. We decided that the following year, we would leave the orchard “as is” and modify it from there. We had 7 edible apples. We’ve heard that an organic orchard is not going to yield the amount that a sprayed orchard would, but 7 was a little ridiculous. We had a problem with fungus, apple maggots,  and coddle moths. A hurricane passed through New England in August, pulling one of our trees right out of the ground, roots and all. We obviously needed to change some things.


One very important thing to do every fall is to remove the old, rotted apples from the ground and get them away from the orchard. Initially we thought “oooh, they’re composting the tree!” While this may be true, a lot of apple pests get into the apple, lay their eggs in the apple, the pests eat the apple from the inside out, and when the apple falls to the ground, they exit and hibernate in the ground until the following spring. To keep the pests to a minimum, simply remove the apples from the ground and dump them in a compost far from the trees (the deer population will love you for this). The other very important thing, is to make sure your tree is pruned properly. A full bodied tree will attract and tend to keep fungus and mold due to the lack of airflow. Plus, a lack of airflow turns your fruit bearing tree into a kite (in the case of our hurricane tree tragedy). Pests also like apples that fit tightly together with little airflow. Make sure that every apple has at least a few inches width around it so air can extend around the fruit and pests can’t congregate. One last thing…continuously check your trees for gypsy moths or tent worms and remove their nests immediately. If given the chance, they could kill your whole tree.

Ok, so cleaning up the apples in the fall…easy. Looking for gypsy moths…easy. How do you prune an apple tree?

First, you need to plan to prune your tree when it is dormant. That means, you can safely prune your tree between December and March (or before the first buds arrive). Luckily for us, we had an unseasonably warm winter. We pruned our trees in January when it was a balmy 60 degrees F outside.

Second, never take more than 30% of the tree at a time. It may take a few years of pruning to achieve it’s perfect shape. Any more taken, and you risk shocking the tree. Dead branches do not count in this 30%, and can be removed at any time during the year.

Third, before slicing off limbs, try to remove all of the water sprouts. The water sprouts are the branches that grow off of a branch, straight up into the air. Water sprouts don’t produce apples, and can be the biggest relief to an airflow problem within the tree. Here are some examples of water sprouts:


Fourth, when you cut a branch, make sure the cut is at a slight angle. An angle in the cut will keep water (rain or dew) from collecting onto that cut surface. A straight cut can collect moisture, grow mold, and can bring the limb disease. There are other ways to “patch up” a cut, similar to a liquid band aid you might buy for a human. Agriculture and gardening stores sell a tree paint to help seal the cut on the tree – preventing moisture from getting into the limb. This tree sealer is only your preference, an angled cut works just as well (and you get the added bonus of not having to pay for it).


(Sorry so blurry)

Large branches can be very heavy, to keep from damaging the tree, use a three cut method. First, cut a slight divet into the underside of the branch. This will keep the bark from peeling off if your branch falls before you were able to cut all the way through the limb. Second, cut farther away from the trunk to remove the weight of the limb before cutting near the trunk. Third, cut the final branch from the trunk. This method will keep the tree from becoming damaged during the pruning, helping it to heal faster. See the diagram below:

Unfortunately, this method came too late for one of our apple trees…the limb we were cutting was way too heavy and it almost ripped the branch in two.

Lastly, you need to remove the tall grass and root growth from the trunk of the tree. An apple tree can not fertilize itself. In order to create an apple, it needs to be pollinated by a different breed of apple. Thus, if you want an apple tree in your yard to produce apples, plant two or more and make sure they are not all the same breed. If your Macintosh happens to be pollinated by a Cortland, the resultant apple will taste like a Macintosh. However, if you planted the seed from that Macintosh, you would not get a Macintosh or a Cortland, instead you would get a mixture of the two.

Each variety was bread for different characteristics and taste. Where as the Mac-Cort might be tasty, you couldn’t sell it as a Macintosh or a Cortland…so without grafting, we would just be selling “apples” instead of Mac’s, Cortlands, Empires, Red Delicious, Granny Smith…and so on. Grafting is the only way to reproduce a tree with the same characteristics of the “mother” breed. Grafting involves removing a small limb from the “mother” tree, and attaching it to the root of another tree (aka, the root stock). You would then plant the root stock, and the smaller limb will grow into an exact replica of the original tree. Sometimes the root stock will branch out on it’s own and begin to grow. Sometimes the root stock is of an apple tree, sometimes it’s a crab apple tree, and sometimes its something completely different.

The root stock will typically grow up and around the trunk of your apple tree. A tree that had been neglected for years might have quite a bit of root stock growth. That growth will make it harder for you to cut the grass around the trunk, to get the fall leaves out or to remove the rotted apples from the base of the tree. Long grass, branches, leaves and apples are a huge turn on to insects, fungus, mold, and critters that can damage your tree. You will need to make sure that the base of the trunk is clear cut.

This is what root growth may look like:

And this is the trunk after the root growth has been removed:

Depending on the type of root stock, the root growth can happen very rapidly. We first noticed this root growth when we moved into the house. We  thought it was the apple tree trying to re-grow itself, so we let it be. Within two years, it killed what was left of this apple tree and is now close to 13 feet tall…so take care of root growth every year before this happens to your apple trees:


Lastly, the shape of your tree can help bring airflow and sunlight into the tree. Most apple tree owners, prefer to cut the central leader out of the tree to limit it’s height. You can’t get to an apple that is 25 feet off of the ground…To do this, cut away the limb that is tallest and near the center, keeping those branches that sit horizontally or grow outward before growing “up”. We cut two central leader branches from this “baby” tree to limit it’s size.

An orchard is a lot of work, but the reward is going to be great.


Categories: Farming | 2 Comments

Introduce Yourself to Your House, by Building Decorative Wall Shelves?

A short project, to give our stairway a little more pizzaz.

When we moved into the house, we often quoted a line from one of our favorite movies, Under The Tuscan Sun. In the movie, Francis leaves her home and friends in San Francisco to take a tour of Tuscany after a painful divorce. While in Tuscany, she stumbles across a villa that is up for sale. A few “segni di dio” , and one giant leap of crazy later, she is the proud owner of a 400 year old villa in Tuscany. As she began moving into the house, she said “Pick one room and make it yours. Go slowly through the house. Be polite, introduce yourself, so it can introduce itself to you.”

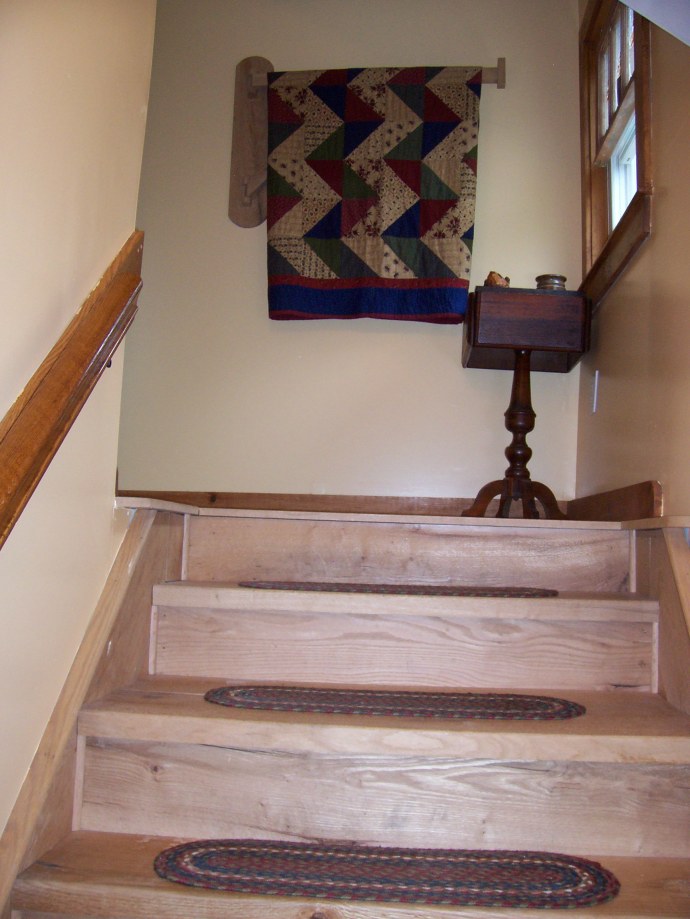
Unlike Francis, who started with the first room that “spoke” to her, we started with the smallest room in the house. After all, remodeling is expensive, and we just indebted ourselves into a mortgage. The least expensive room to remodel was the stairway. Unknowingly we had already started remodeling the stairway the day after we moved in. Our stairs are made of beautiful reclaimed wood boards. In order to show off the beauty of the stairs, they were left unfinished  and without carpet. This made them very slippery. The first night in the house, we had been moving boxes up and down the stairs. Rhonda, our greyhound, was giddy with the excitement of a house to call her own. On the way up the stairs, Rhonda slipped and broke her shoulder. To keep her from slipping on the stairs again, we scoured town for any kind of carpet to place on the stairs to create some friction. We found a slew of colorful braided rugs at a country store. These rugs were long and thin, and could be placed on the top of each stair while still letting their beauty shine through.

The matte white walls of the hallway screamed boring, so we chose a color that speaks to our eyes (and our stomachs), Chai Latte. If I can give any advice about how to choose a paint color, I would tell you this: stick to normal colors that you’ve heard of before. The more complicated a paint color is, the more complicated it is going to look on the wall. We chose Chai Latte because the swatch looked like a warm, brownish-peach. Compared to the white on the wall, this was a welcomed change. We started painting just after dinner and into the evening. In the dusk of twilight, the paint color looked Creamsicle Orange. Unnerved, we crossed our fingers, hoped for the best, and kept painting. In the morning, the sun comes up over the hill and shines into our stairway window. The morning sun reflected off of our semi-gloss paint casting a bright pink into the bedroom. Holy Crap. Only under the low light of an afternoon sun, does the hallway actually look like Chai Latte.

We hated the paint color, but were stuck with it for now. We decided to use Sarah’s art intellect to contrast the color. “What color would help to mellow the orange in the paint?” “Green.” We began discussing ideas of stairway accents that could be painted green. I wanted to try to bring the house back into the orchard that it was placed in. In many places, we had seen several apple ladders in passing. An apple ladder  is similar to an A Frame ladder, but is tapered near the top and very wide at the bottom. Like this:

We decided that this would make a great decorating piece in our stairway, especially since the ceiling in our stairway was so tall. At first we began to look at new ones, but found them to be too expensive to paint green and put in a stairway. We then started looking for old ones that people weren’t using anymore…except that the ones that had been used were only useful if they were 10 feet tall, or taller. Sarah said, “I can build you one if you aren’t planning to actually stand on it.” 

Sarah spent two afternoons putting a ladder together. When she was finished, Nikki painted it green (as promised) and rubbed it with sandpaper to make it look stressed and antique. A few grapevines and fake berries were added to brush it with detail and color, now all it needs is a quilted crow sitting on a step. We placed it in the stairway, and it looked great.

Now we were on a roll. We decided that our next venture for the stairway would be shelves to set pictures and knick knacks on. We needed something shallow to fit snug against the wall…we didn’t want to have to dodge shelves as well as  the low ceiling on the way up and down the stairs. We looked at the shallow wall shelves at hardware stores and decorator stores, but found that they were either cheap and ugly, or really really expensive. In order to recreate a shallow shelf, we decided to use a strip of decorative moulding.  Sarah put a thin decorator board on top to give it a few more inches of knick knack holding power.

Sarah attached them to the wall, and they were perfect.

Nikki did the hardest part, she placed the knick knacks and pictures on top (heavy lifting).

Categories: Remodeling, Wood Work | 2 Comments

Create a free website or blog at WordPress.com.